Helm
Standard version
Prerequisites
Hardware
- 2 CPU cores
- 8 GB of RAM
Software
- Container manager: Currently tested on Docker and ContainerD.
- Kubernetes (recommended) or K3s.
- Helm version 16.14 or above.
Installation
First of all, you have to add ERTIS Research group helm repository to your helm repository list:
helm repo add ertis https://ertis-research.github.io/Helm-charts/
Once done, the next step is installing the chart by executing this line on your terminal (in our case, we will use opentwins as release name and opentwins as namespace, but you can choose the one that you prefeer). To customize the installation, please refer to Helm's values file.
We recommend to modify the default passwords and tokens for Grafana and InfluxDB before deploying the platform. Currently, to avoid potential problems, we do not recommend changing Eclipse Ditto's username and password.
helm upgrade --install opentwins ertis/OpenTwins --wait --dependency-update --debug
After waiting some time, the installation will be ready for use.
Configuration
If you have kept the default values of the Helm chart, you will only need to configure the OpenTwins interface plugin for Grafana.
Obtain external URLs for Eclipse Ditto, Ditto Extended API and Grafana.
Get the name of the services with kubectl get services. The result will look something similar to the following image. If you have changed the name of the release, the names will not be preceded by opentwins, but by the name you have assigned. We are interested in the services opentwins-grafana, opentwins-ditto-nginx and opentwins-ditto-extended-api.

The method to obtain the URL may vary depending on the configuration of your cluster. Generally, the URL for each service will match the cluster IP and the NodePort (the number after the colon). For example, if our cluster IP is 192.168.32.25, the URL for Grafana would be 192.168.32.25:30718.
Are you using Minikube to deploy OpenTwins?
As Minikube is a local cluster, you cannot directly use the IP of the cluster. Therefore, you will have to expose the services that you want to use externally with a command.
Open three terminals, one for each service, and run the following command on each terminal with a different service name. These will return a URL of your localhost with a port that will forward all traffic to the specified service. These are the URLs you should use.
minikube service <service-name> --url
Add URLs to OpenTwins plugin configuration
Access Grafana in any browser with the URL you have obtained. The credentials must match those indicated in the Helm values, which by default are user admin and password admin.
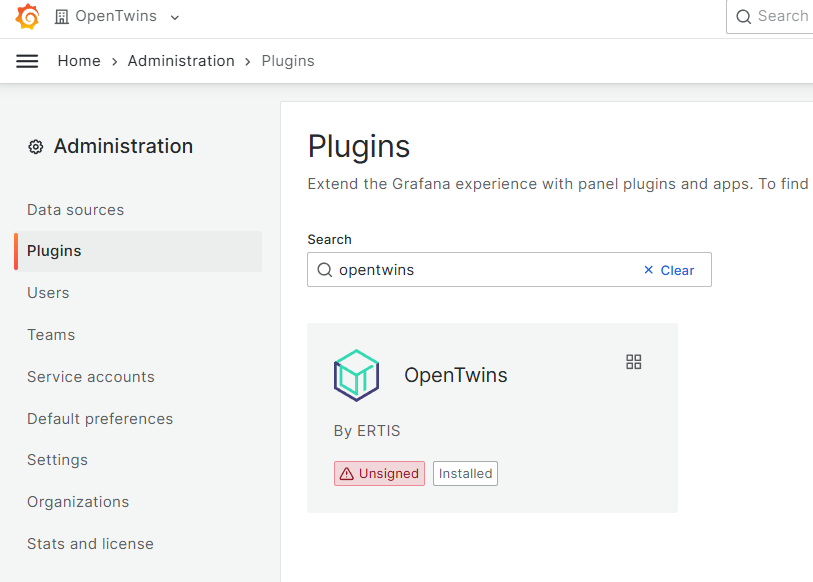
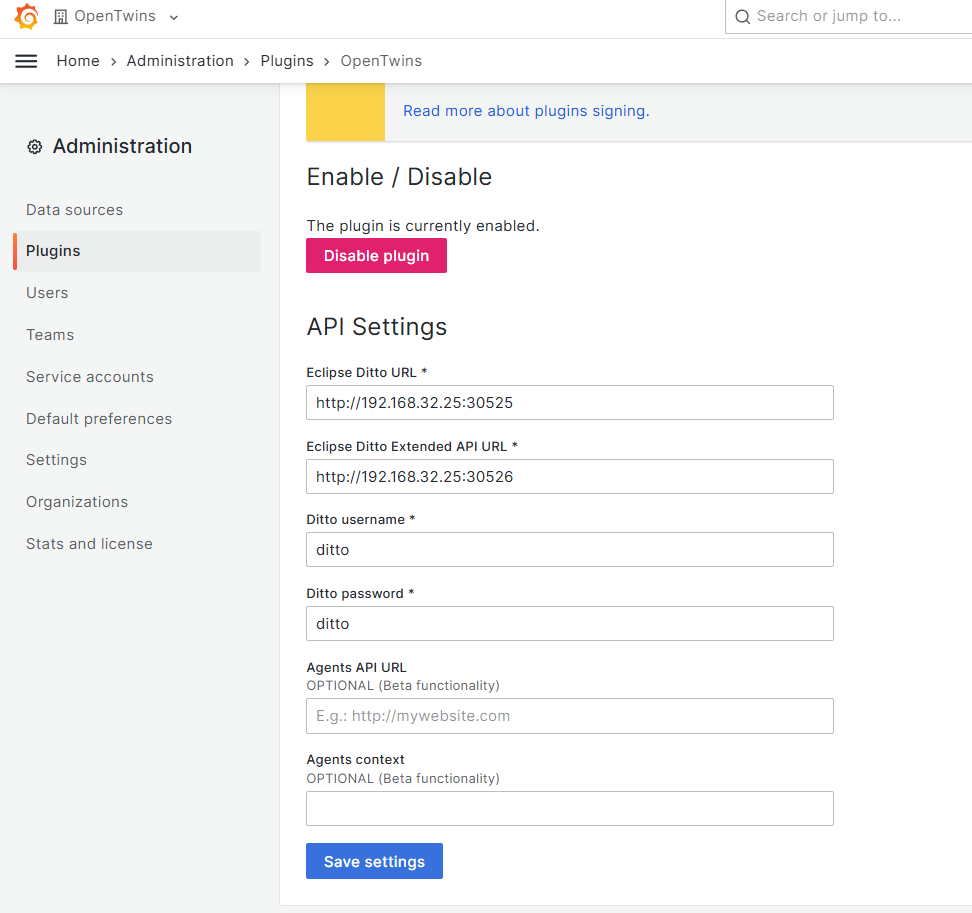
Access the left drop-down menu and select Administration > Plugins. Once there, find the OpenTwins plugin and activate it by clicking Enable. Then, go to the Configuration tab where you will need to enter the Eclipse Ditto and Extended API URLs in the corresponding fields. Use ditto for both the Eclipse Ditto username and password if you have not changed the credentials. Then click on Save settings to complete the plugin configuration.
Screenshots


If you are using the latest version of the interface, you may find two fields intended for an agent service. This functionality is currently under development and is not yet available, so leave them empty and disregard them for now.
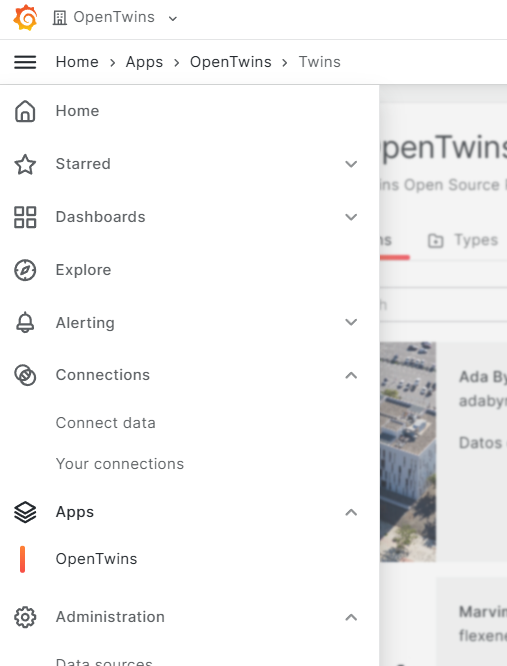
Find the available application in the App > OpenTwins section of the left drop-down menu.
You can now start using OpenTwins.
Lightweight version
Prerequisites
Hardware
- Raspberry Pi 4
Software
- Container manager: Currently tested on Docker and ContainerD.
- Kubernetes (recommended) or K3s.
- Helm version 16.14 or above.
Installation
OpenTwins has it's own lightweight version that aims to run on IoT devices such as Raspberry Pi devices. To install this versión, you have to follow the first step in order to add ERTIS repository to your repository list and then install the platform using the command bellow:
helm install ot ertis/OpenTwins-Lightweight -n opentwins
In this case connections still need to be made for the platform to work properly. Check the manual documentation to learn how to do it.